Bass Drum Overhaul
In 2007 I bought my first concert bass drum, a 28″ WFL Ludwig drum made in 1939. It needed some serious repairs, so I set it aside. Shortly thereafter I got a second bass drum that was in good shape, so I never got around to repairing or using the first bass drum. I actually forgot about that old WFL for several years and only unearthed it from the basement when I moved to Lowell in 2013.
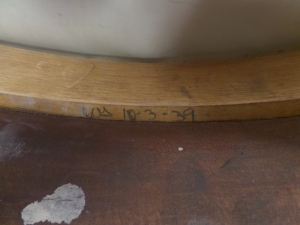
Unfortunately I don’t have a “before” pic of this drum so you can’t see what it looked like prior to the work that was done. Suffice it to say, it was in bad shape. The lugs were dented, the tension rods were rusted and warped, and the drum rattled like crazy. So I started by having the hardware removed from the shell, then filling the holes with a two part wood filler. The shell was then sanded, coated in an ebony polyshade, lightly sanded again, and topped with spray lacquer.
I definitely did not want to go through the laborious process of drilling new holes and installing new lugs. I thought back to a few bass drums I’ve seen in the past that did not have lugs at all. The heads were tensioned by a single tension rod that spanned the depth of the shell, and was inserted into a threaded claw on one side. This style of hardware went out of style a long time ago, and the one set of vintage threaded claws I found on eBay were too small for the shell. After shelving the project again for a couple months, I thought of a cheap and easy solution, which is often the answer in many a drum hardware question: threaded rods.
You can get simple threaded rods at any hardware store. So I took a bass drum claw to Home Depot and found the correct gauge of threaded rod, cut them to size, and tightened them to the claws with wing nuts. I then used felt pads, also available at most hardware stores, to form a center support to keep the rods from bending under pressure and scratching the shell.
I’m not sure why threaded claws went out of style. Anyone with an old bass drum knows that rattles are a huge problem. The rattles are almost always caused by the lugs, which on a relatively loosely tensioned concert bass drum are not really necessary. Another benefit of the threaded claw is that the two heads are automatically equal in tension.
I’ve heard a lot of bass drums of this approximate size and vintage, and this drum sounds better than any of them by a mile. I think it is due to the simple and unobtrusive hardware and the automatic balance between the two heads.

My neighbor and craftsman extraordinaire J Haley cutting the threaded rods to size with an angle grinder. He did all of the aforementioned work on the shell as well.

Closeup of the wing nut securing the threaded rod to the claw. The other side of the drum is a mirror image.

The center support felts don’t look great from up close, but from a slight distance you can barely notice them.
It is also worth noting that this style of hardware is about 5x cheaper than traditional drum hardware.
Steve Weiss Saucer Bells (keyboard layout)
In the context of a large Steve Weiss order, and somewhat on a whim, I bought these Saucer Bells. I liked the idea of having a weird set of chromatic bells, and for getting an octave of something they are pretty cheap.
As pictured, they come hung on a single length of rope. In that fashion they sound like a pretty decent bell tree, but that isn’t what I wanted them for. Using more or less the same method I described in this earlier post about making crotale stands, I made a stand for these saucer bells with a keyboard layout.
I finished the stand further by using beveled and flat rubber washers (found in the plumbing aisle) to keep the bells from rattling against the bolts. I also used the smallest 2 and 3 inch bolts I could find, which were still slightly too big for the holes in the bells, so I just drilled the holes in the bells to make them bigger. This did not change the intonation at all. Note: these bells are quite in tune.
A useful innovation I stumbled upon, which can also be applied to homemade crotale stands, was to use a coupling nut to mount the instrument to a cymbal stand. This is similar to the way in which brand name crotale stands are mounted. For this, I used a 3/8″ coupling nut with a carriage bolt and lock nut. It fits well in to light-weight Yamaha stands, and is more sturdy than some of the hardware I’ve seen on brand name crotale stands in the past.
The range of the bells is C7-C8 (the noted range of C6-C7 on Weiss’ website is incorrect). In terms of overtones and sustain, they are closer to a glockenspiel than to crotales, but they are no substitute for either.
Trap Tables
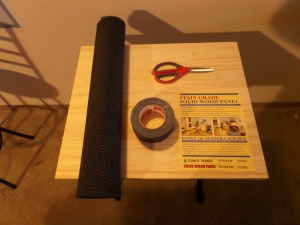
This one is simple: You can spend over $100 on a professionally made trap table, or you can spend $10 and make your own. Here is what you need:
Then do this:

Use two layers of the drawer liner, and gaff tape.
Mount it on a folding keyboard stand. If you want to get fancy, add some trim to the back and sides to keep things from falling off. This particular stand measures 20″x24″ (single slab of 20″x48″ cut in half, makes two tables).
Hooked Dowels
I shake my head in disappointment when I see the complicated and ineffective ways that percussionists use to hang instruments. Unless everyone goes out and buys specialized Gibraltar or Kolberg whatevers for every need, we’d all be better off if percussionists the world over adopted this method.
Get a dowel and some 1″ cup hooks and do this:
Then you can do things like this without the need for plastic zip ties or whatever method you were using before:
You can also make smaller versions with a hole drilled in the center, which can support a single heavier item with one cymbal stand instead of two.
Organizational Life Pro Tip
I would have saved a lot of money if I did this a long time ago…


